| Welcome to Wars Wiki! |
|---|
| Welcome, new users! For help on where to start, look at our getting started page and our manual of style. Need more help? Ask a staff member! |
A Matter of Honor
| A Matter of Honor | |
|---|---|

| |
 VS VS 
| |
| Allied Forces | |
| Player Faction | Solar Empire |
| Allies | None |
| Enemy Forces | |
| Primary | Anglo Isles |
| Secondary | None |
| Other Intel | |
| Location | The Imperial Palace |
| Result | Imperial Palace withstands Anglo capture attempt |
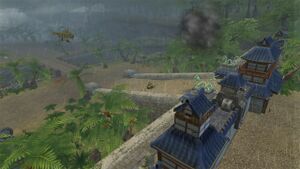
A Matter of Honor is the third level in the Battalion Wars 2 campaign.
Intel[edit | edit source]
Clear out the Anglo units on the beach, then advance to the Helipad. Send the distress signal to call in reinforcements to bolster the Imperial forces. Take out the enemies near the gate, and advance to the next Gold Star. Imperial Assault Vets will emerge from the trees, adding even more power to the Solar forces. The path splits in two; choose either way. Destroy the two Anglo Artillery on the bridges leading the Imperial Palace, then advance to the Imperial HQ. Lock onto the two MG Nests near the HQ flag, select a Grunt for each, and press the A-Button to order him into a nest. From here on, the player's forces must the palace from the incoming Anglo forces. Lock onto the HQ flag, and order all units into Wait Mode; if the flag comes under attack, the Solar forces will immediately counter-attack. Protect the HQ flag, and eliminate the waves of Anglo units entering from the two bridges to complete the mission.
Units[edit | edit source]
Player (Solar Empire)[edit | edit source]
Starting:
- Grunt (7)
- Light Tank (2, start)
Join:
- Bazooka (4) - Helipad capture
- Assault (4) - north of enemies north of the Helipad
- Grunt (3) - near the Palace HQ
Enemy (Anglo Isles)[edit | edit source]
Near starting point:
- Grunt (7)
- Light Tank
Respond to Light Tank's destruction:
- Grunt (1)
- Bazooka (2)
Near the Helipad:
- Grunt (2)
- Flame (2)
- Light Tank
Respond to Helipad capture:
- Grunt (6) - 3 in west group, 3 in east group
- Light Tank (2) - 1 in west group, 1 in east group
North of Helipad:
- Grunt (2)
Respond to attack on enemies north of Helipad:
- Grunt (2)
- Light Tank
Respond to Assault join:
- Light Tank - west
- Bazooka (4) - east
Artillery groups:
- Grunt (4) - 2 in west group, 2 in east group
- Bazooka (6) - 3 in west group, 3 in east group
- Artillery (2) - 1 in west group, 1 in east group—attack Palace
North of Artillery groups:
- Grunt (5)
HQ Attack Air Transports (only the contents count for Power):
- First wave #1 (SW) - Grunt (4)
- First wave #2 (SW) - Grunt (4)
- Second wave #1 (SE) - Light Tank
- Second wave #2 (SE) - Light Tank
- Second wave #3 (SW) - Grunt (6)
- Third wave #1 (SE) - Grunt (4) + Light Tank
- Third wave #2 (SW) - Grunt (4) + Light Tank
- Third wave #3 (NW) - Flame (4)
- Fourth wave #1 (SE) - Grunt (6) + Light Tank
- Fourth wave #2 (SW) - Grunt (6) + Light Tank
- Fourth wave #3 (NW) - Bazooka (6)
Total:
- Grunt - 63
- Bazooka - 18
- Flame - 6
- Light Tank - 12
- Artillery - 2
- Air Transport - 11
| ← Mission 2: Rally the Defenses | Battalion Wars 2 Campaign | Mission 4: Showdown at Big Honshu → |